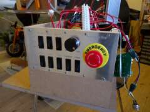
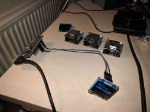
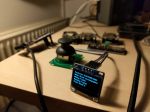
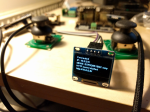
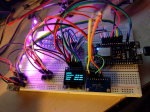
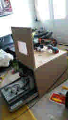
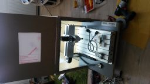
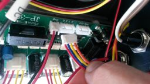
Posted: 29 sep 2019 by Daniel For the last 5 years, ive had my PC control my lights, using a program called Eventghost and an Arduino with RF modules.
I've recently gone over the setup, and updated it to make use of existing eventghost plugins.
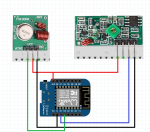
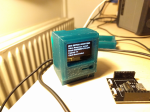
 To build the hardware, I used a Wemos D1 Mini, based on the ESP8266, with a set of $1 433mhz modules from ebay.
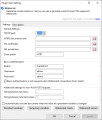
 You want to add and configure the Webserver Plugin in EventGhost, the arduino sketch does not support HTTPS.
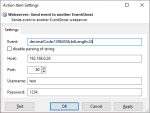
 Then you can configure an action in eventghost like this : "decimalCode:13964556,bitLength:24,repeat:4"
 The arduino also sends all RF switch messages it decodes, back to the eventghost server as an event, with json payload data. This way you can record your remote and create webserver actions to trigger them.
 You can't use the events decoded directly, as the raw data and length, tend to shift a little. But it's possible to use python commands to parse the json and create this behavior.

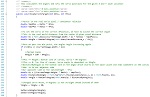
import json

json_string = eg.event.payload[0]  # <-- payload is object type 'list'

# this converts the json data into a python dictionary or a list of dictionaries
# depending on how the json is formatted
json_data = json.loads(json_string)

decimal = json_data['decimal']
protocol = json_data['protocol']
delay = json_data['delay']
length = json_data['length']
raw = json_data['raw']

#decimalCode:13964556,bitLength:24
payload = "decimalCode:" + decimal + ",bitLength:" + length

#eg.TriggerEvent(suffix, payload=None, prefix='Main')
eg.TriggerEvent("Action", payload=payload, prefix='RF433MHZ')

#or set payload to use in next action
eg.event.payload[0] = payload
You must have the necessesay boards in your preferences boards url : http://arduino.esp8266.com/stable/package_esp8266com_index.json
And you must download and install the following library:
RC-Switch https://github.com/sui77/rc-switch/releases/latest
Download Sketch: http://drebsdorf.net/Content/eventghostarduinowebserver/Eventghost-arduino-webserver.zip
You want to configure the sketch before compile and upload. Namely you want to set the IP of your eventghost webserver machin. And also configure Wifi Connection settings aswell as authentication settings.
 Compile the sketch for the arduino with the following, if you're using the same board as me. Sometimes it wont let you flash the arduino, if the RF modules are connected.
 You can also use Cortana to trigger events in eventghost, by creating a shortcut to eventghost and supplying an event to trigger.
"C:\Program Files (x86)\EventGhost\EventGhost.exe" -event TriggerLights
You can also use Cortana to trigger events in eventghost, by creating a shortcut to eventghost and supplying an event to trigger.
"C:\Program Files (x86)\EventGhost\EventGhost.exe" -event TriggerLights
 Save the shortcut as "Trigger Lights" and you can say "Hey Cortana, open Trigger Lights" and it will trigger the event.
Then you can drag and drop that event from eventghost's event log, to the macro you wish to trigger, fx a light macro :)
Enjoy
*Update, fixed JSON string, added "pulseLength" as optional variable to send when sending events to the arduino.
Save the shortcut as "Trigger Lights" and you can say "Hey Cortana, open Trigger Lights" and it will trigger the event.
Then you can drag and drop that event from eventghost's event log, to the macro you wish to trigger, fx a light macro :)
Enjoy
*Update, fixed JSON string, added "pulseLength" as optional variable to send when sending events to the arduino.
|
Posted: 05 maj 2017 by Daniel Hi,
Short update on my projects, hope you enjoy.
Here's a short ordered list:
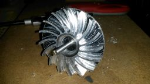
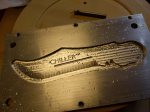
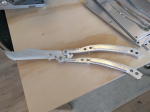
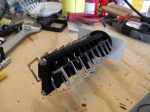
- Intake Manifold
- Aluminium impeller test
- Automatic reloading air turret
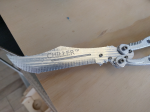
- CS:GO Knife model
- Fixing up the cnc with new controls and 3d prints
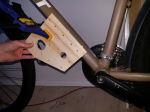
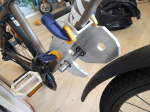
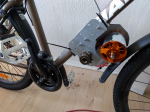
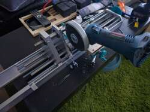
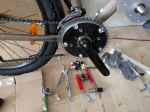
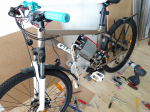
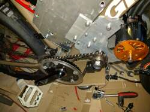
- Project "electric bicycle" continued improvements from 80kph upwards
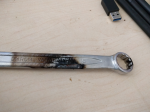
- Melted wrench on bicycle batteries
- 2.4ghz bi-quad yagi
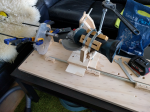
- 3D Printed Lathe Chuck
- Brass slider
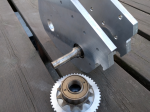
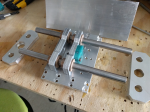
- Making an aluminium lathe (to make a shaft for the bicycle)
- Experimented with some plaster milling for glass casting
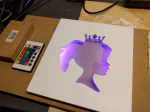
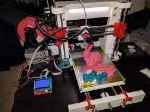
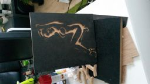
- Made an RGB princess silhouette for my niece
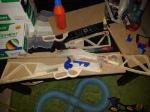
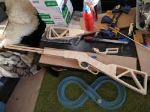
- Built 3 rubber band winchester rifles (design is on my thingiverse page)
- Toying around with arduinos
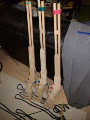
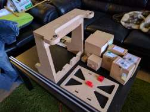
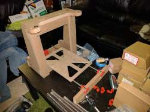
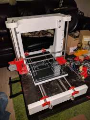
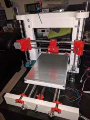
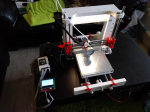
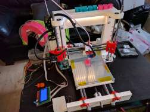
- Built a better 3d printer, entirely my own construction
- Got a polarized filter to eventually build a proper 3d scanning machine.
- More arduinos and a couple more 2.4ghz antenna designs.
- Thingiverse Account

|
Posted: 22 apr 2016 by Daniel I wrote a piece of software to interface with a SLAM device. Which stands for "Simultaneous localization and mapping" and they have all sorts of fun uses.
The device used is a SLAMTEC Robopeak Lidar A1, http://www.slamtec.com/en/Lidar/A1
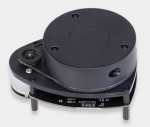
There is a new model out, which I have not tested, but I would presume it uses the same protocol.
Since there is no source code available to connect to the device with .NET, I have gone ahead and created some source code which handles the connection and communications protocol of the A1.
I have used this to create a simple wall sized touch interface.
The touch code is not shared, simply because its not release worthy (way too ugly), but you will be able to connect to the device and get usable point data easily.
Download Source
http://drebsdorf.net/Content/rplidar/C#Src-SlamtecRobopeakLidar-A1.zip
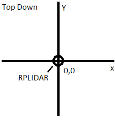
The code will output coordinate, angle, distance data once connected.
With the lidar device being at 0,0 and displaying everything around it, in a top down view. (it's a horizontal line scanner if you will)
Download Case Model
I also created this 3d printable model for a case to mount the lidar on a wall.
http://drebsdorf.net/Content/rplidar/RPLidarA1-Case.zip
|
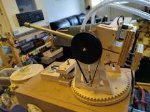
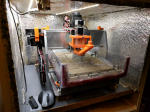
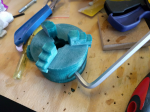
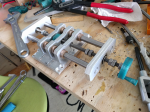
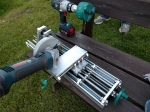
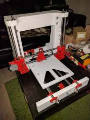
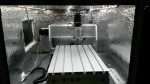
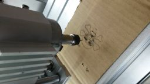
Posted: 25 jan 2016 by Daniel So a couple of years ago now, I bought a chinese 3040 CNC. Namely a 320W 3040DQ.
The main reason for the purchase was that I felt a need to make some physical stuff, altough I can work a hammer and saw rather well, doing fine mechanics by hand would be impossible.
Second reason was educational, have to admit, it's pretty fun to use.
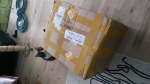
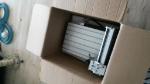
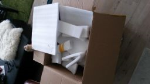
Unboxing
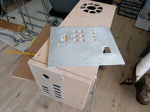
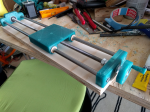
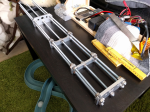
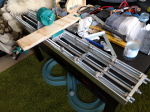
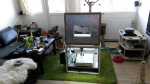
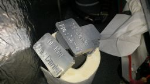
 To be able to use the router in an apartment setting, I had to build some sound proofing as to not disturb my neighbors too much.
Made from 22mm MDF and a leftover kitchen table for the shelf, and insulated with auto sound proofing foam, it does a very nice job of keeping things quiet, and warm...
To be able to use the router in an apartment setting, I had to build some sound proofing as to not disturb my neighbors too much.
Made from 22mm MDF and a leftover kitchen table for the shelf, and insulated with auto sound proofing foam, it does a very nice job of keeping things quiet, and warm...
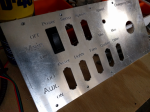
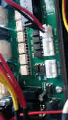
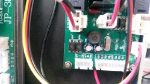
 There are a couple of good guides on how to mod the control box for PWM signal control through mach3 aswell as limit switches, and mine came without these functions.
Time to bring out the soldering iron.
I also added a waterbath for cutting aluminium, altough you can do it with WD40 spray, it's nice to have If I ever have to cut glass or carbon, as the dust is quite hazardous.
The CNC box was mounted on a rack with wheels, so it moves around the apartment easily. Now the box fits though my door, but the rack dosn't... doh
There are a couple of good guides on how to mod the control box for PWM signal control through mach3 aswell as limit switches, and mine came without these functions.
Time to bring out the soldering iron.
I also added a waterbath for cutting aluminium, altough you can do it with WD40 spray, it's nice to have If I ever have to cut glass or carbon, as the dust is quite hazardous.
The CNC box was mounted on a rack with wheels, so it moves around the apartment easily. Now the box fits though my door, but the rack dosn't... doh
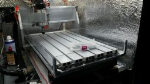
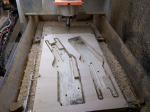
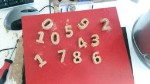
 First Cuts
A few shots of some of the first things that I cut
First Cuts
A few shots of some of the first things that I cut
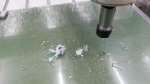
 Aluminum
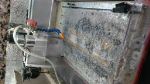
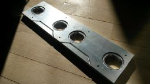
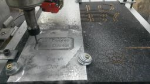
Progressing to cutting aluminium, I do 0,1mm passes at full speed, will have to play with it some more. It's very messy compared to routing wood.
Aluminum
Progressing to cutting aluminium, I do 0,1mm passes at full speed, will have to play with it some more. It's very messy compared to routing wood.
 You can follow me on thingiverse here: http://www.thingiverse.com/TAz00/about
|
Posted: 12 okt 2013 by Daniel
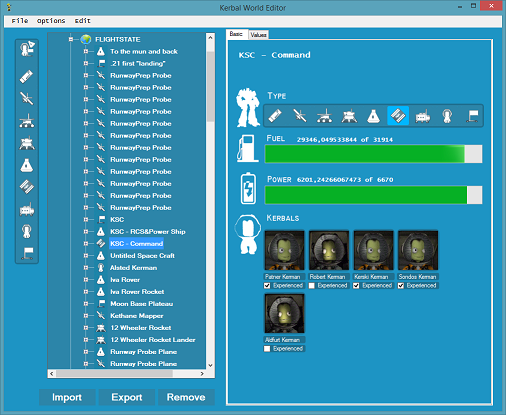
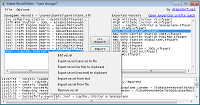
So I've been playing more Kerbal Space Program.
I've had some help designing a new interface for my kerbal world editor app.
Which let's you export and import flying craft. And incidently, copy them.
This is a beta release, so have as much fun as you can with it. And report back any errors.
 Download:
- Download KerbalWorldEditor-0.21.1.7z (239KB)
- Download KerbalWorldEditor-0.21.1.zip (446KB)
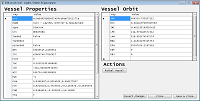
- Options:
- Export / Import Craft, Kerbals and Flags
- Control fuel and power with sliders
- Edit all parts and thier values
- Docking ports won't stop working anymore
- Automatic backups, which can be restored from menu
- Change craft type
- Remove craft
- And all sorts of stuff with the Values tab
- Confirmed working with .21 and .21.1
- Known issues:
- Experienced kerbals option don't work
- Kerbals are not exported with the craft
- Search options don't work
To duplicate/copy craft with this you should do the following:
* Launch your craft into orbit
* Export it using the editor
* RCS in some direction, or the copied craft will spawn inside the first
* Exit to the start menu
* Import the exported craft using the editor
* Save your changes
* Now go back to your craft, there should now be another close by.
|
Posted: 17 jan 2013 by Daniel So I've been playing this game called Kerbal Space Program.
It's a nifty physics simulator where you build and launch your own rockets to into space and visit other planets.
After playing a while with a friend, and reading the forums, I see that sharing craft/vessels is popular. Since you can easily copy the craft designs saved .craft files.
But you could not share landed or orbiting craft.
So I've made a program which let's you export/import orbiting or landed craft.
Download:
- KerbalWorldEditor-v0.1.1.7z (177KB)
- KerbalWorldEditor-v0.1.1.rar (199KB)
- KerbalWorldEditor-v0.1.1.zip (548KB)
Features:
Export craft
Import craft
To/From Clipboard, File, Text etc...
Edit craft
Refuel craft
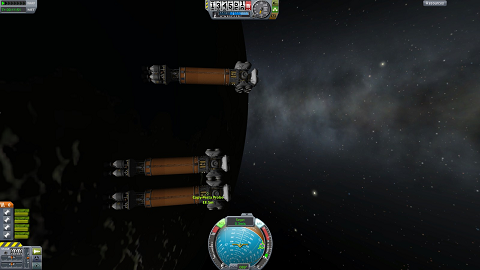
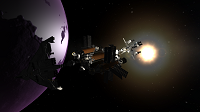
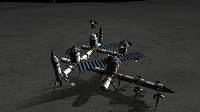
And I have included, in the download, a few vessels that I would like to share.(see pictures above)
Feedback drebsdorf@gmail.com
|
Posted: 13 apr 2011 by Daniel I have to admit, I'm a bit of a WiFi freak, playing around with aircrack-ng in vmware i needed some more signal. (for the uninformed, aircrack is a wireless network penetration testing tool)
I already own a few adapters from
http://www.data-alliance.net/
Namely the all famous Alfa AWUS036H (500mW version), along with a high quality d-link 7dbi omni direction antenna.
So what do you do when you want more signal free? you build your own parabolic reflector =D
This one gave me 45 total networks instead of 34 with just the omni, my unstable connections now have a solid signal.
These were built from referencing :
http://urbanwireless.info/antennas/parabolic-reflector
http://www.freeantennas.com/projects/template2/index.html
|
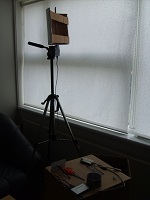
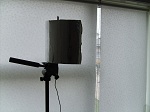
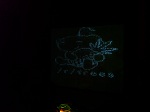
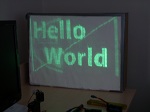
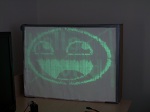
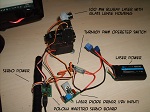
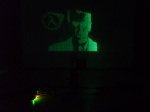
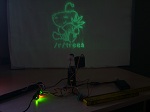
Posted: 07 apr 2011 by Daniel For some time I have been toying with a couple of servos and a bluray laser. The bluray laser wavelength of 405nm is ideal for activating glow materials.
So with a small amount of trigonometry I've created a laser plotter, that will draw an, almost, undistorted stencil on a glow in the dark painted background.
Materials:
Glow inc V10 green glow powder: http://glowinc.com/detail.aspx?ID=42 (I bought 1kg which was $160, you won't need this much)
Pololu Maestro Servo controller board: http://www.pololu.com/catalog/product/1350 $20, an excellent tiny servo controller board, provides C#.net support)
A couple of servo motors from www.hobbyking.com
and a servo signal operated on/off switch for the laser, also from Hobbyking http://www.hobbyking.com/hobbyking/store/uh_viewItem.asp?idProduct=8833

|
Posted: 04 mar 2011 by Daniel I've been toying with the Kinect sensor a bit, projects page has a bit more detail, but take a look at this video
|
Posted: 30 nov 2010 by Daniel  Testing CMS, one two three four five six
*Edit, google dosnt like Lorem ipsum
|
Posted: 30 nov 2010 by Daniel  And this is my new website, dedicated to me and all of my doings.
This website may look simple, but it's really a C# .NET CMS demonstration.
What will you find here? Things about me, things I've done in the past, and things I am currently doing.
|